

SunLicense Server Setup Guide
Step 1: Purchase and download server.jar
1
Visit the SunLicense resource page
Go to the SunLicense resource page to purchase your license. See Where to buy for other marketplaces.
2
Choose a payment method
You can pay with PayPal, Credit/Debit Card or Cryptocurrency. All payments are processed securely through Tebex.
3
Download the server.jar file
Once your purchase is complete, you can download the
server.jar file.While purchasing the license, you can also add Managed Hosting. With this add-on, we manage and host your server, and you don’t need to do anything beyond this step. See Managed Hosting.
Step 2: Request a license key
Join our Discord server, go to the #premium channel and click Request License. A developer will send you your license key shortly. Keep it safe, as you’ll need it later. See Get your license key for the full steps.Step 3: Import SunLicenseEggShell to Pterodactyl
Download SunLicenseEggShell (egg-generic-java.json)
A modified generic Java egg for running SunLicense on Pterodactyl Panel. The Generic Java Egg was created by parkervcp.
1
Download the SunLicenseEggShell
Download the egg file from the link above.
2
Go to your Pterodactyl admin dashboard
Log in to your Pterodactyl admin panel.
3
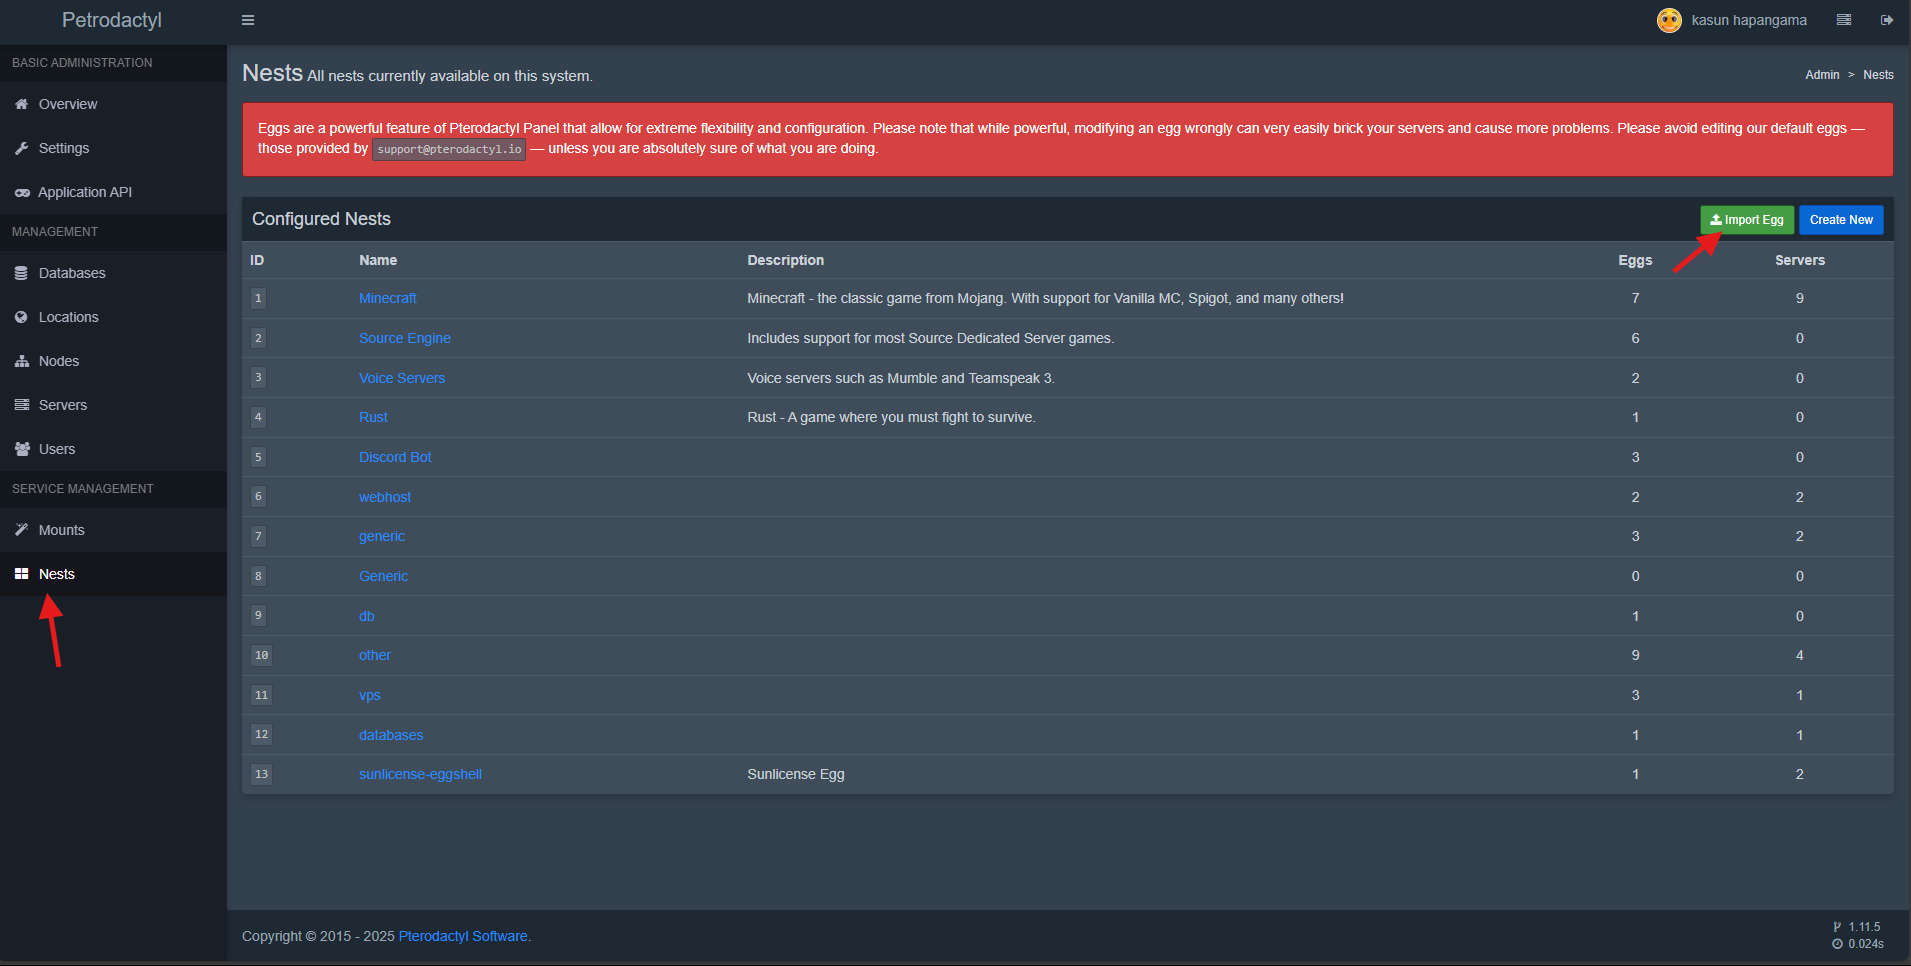
Navigate to Nests
In the Service Management section, select Nests.
4
Import the egg
Click the green Import Egg button and upload the egg file you downloaded.
Step 4: Create and start a server
1
Go to the Servers section
Navigate to the Servers section in your Pterodactyl panel.
2
Click Create Server
Select the Create Server button to set up a new server.
3
Configure server resources
SunLicense typically requires these minimum resources:
- CPU Cores: 1 Core
- RAM: 1 GB
- Storage: 2 GB
4
Select the egg
Choose the egg you imported in the previous step.
5
Upload server.jar
Go to the Files tab of the new server and upload
server.jar.6
Create license.txt
- Create a file called
license.txtnext toserver.jar. - Paste the license key you received in Step 2.
- Save the file and start the server.
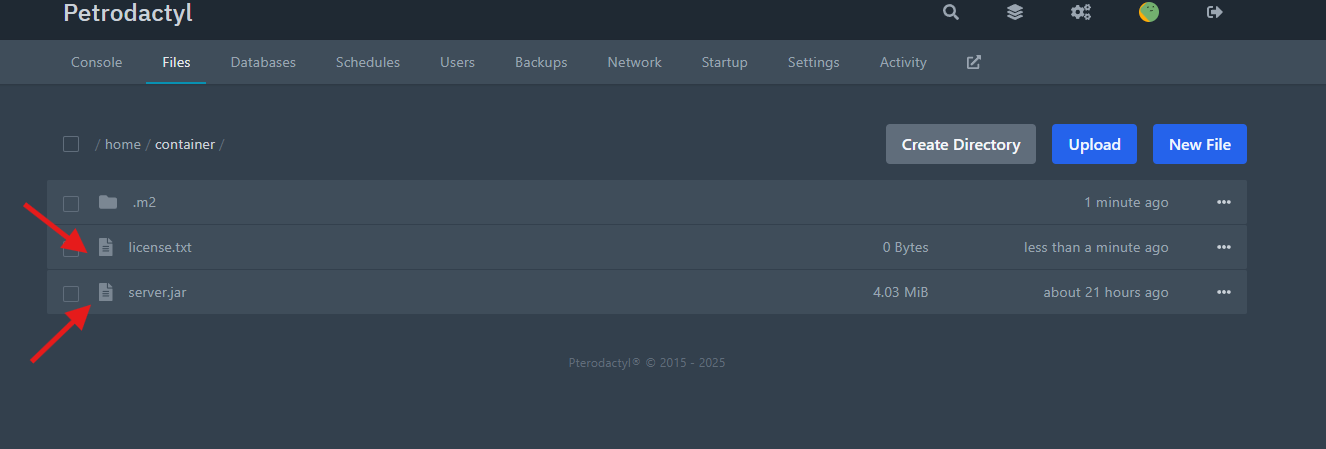
On the first start, the SunLicense server automatically downloads the required dependencies. This can take several minutes, and a folder named
.m2 will be created. Wait until the process is complete.Step 5: Access the SunLicense dashboard
1
Visit your server address
Open
http://{serverip}:{port} in your browser, replacing {serverip} and {port} with your server’s IP address and port.2
Log in
Use the default credentials:
- Username:
admin - Password:
admin
3
Update your credentials
Go to the Settings page and change the default credentials.